※ Latest version: StylePix , StylePix Pro
The Gradation Fill tool allows you to fill a gradation that is a set of colors arranged in a linear order. By default, Hornil StylePix provides some gradation presets.
 icon in the tools panel.
The Gradation Fill tool's options are consisted with three parts: Preset, Point, and Output.

The preset is set of some useful gradations and allows you to edit them.
Reset command resets the gradation preset to initial state.
Load command loads the gradations from the file.
Save command saves the current showing preset to any folder.
New command creates new empty grdation.
Delete command allows you to delete the selected grdatation from the preset list. The below image shows the gradation edit controller and point controllers that has another controllers by current selecting point.
Add command adds the current editing grdation to preset.
The selected gradation is edited by the following gradation edit controller. This controller is divided into upper and lower parts. First the upper part represents the opacity points. And the lower parts represents the color points. The below image shows the gradation edit controller and point controlling part that has diffrent controllers depending on the current selecting point.
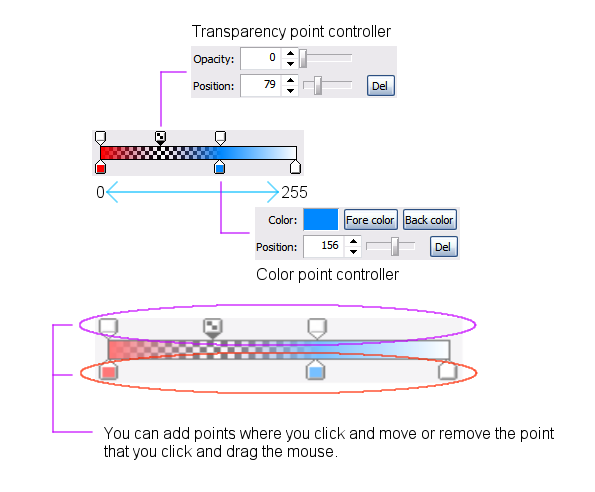
You can add points where you click and move or remove the point that you click and drag the mouse. You can choose the color point that has foreground color or background color. It's very useful to make the flexible gardation.
Here are four types of output.

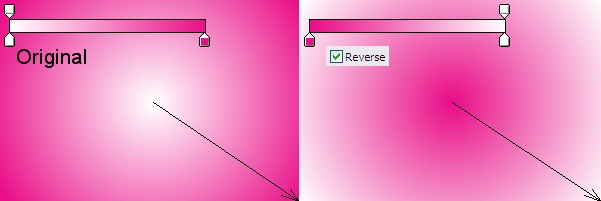
Reverse command revese the gradation.
Blending is used to determine the gradation fill is blended into the layer. For more details about Blending, see Blend Modes. You can make various effects such as following examples using the blending.

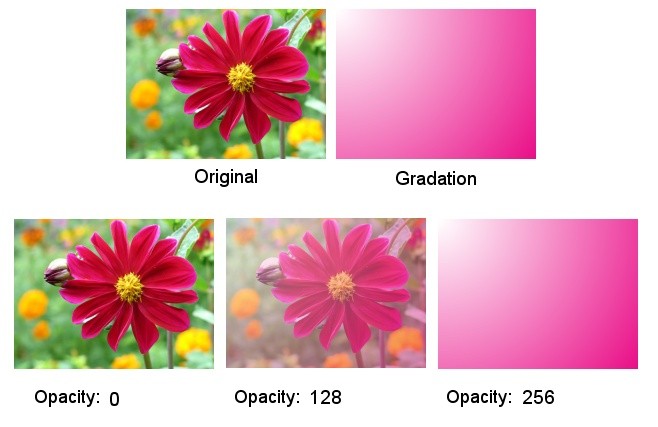
The opacity represents to the amount of transparency a layer has. Opacity ranges from 0 to 255, with 0 meaning complete transparency(that is, invisible), and 255 meaning complete opacity.